On THEA, click ‘From’ to select an origin network. For example, select AssetHub if depositing USDT, or Astar Network if depositing ASTR, respectively.
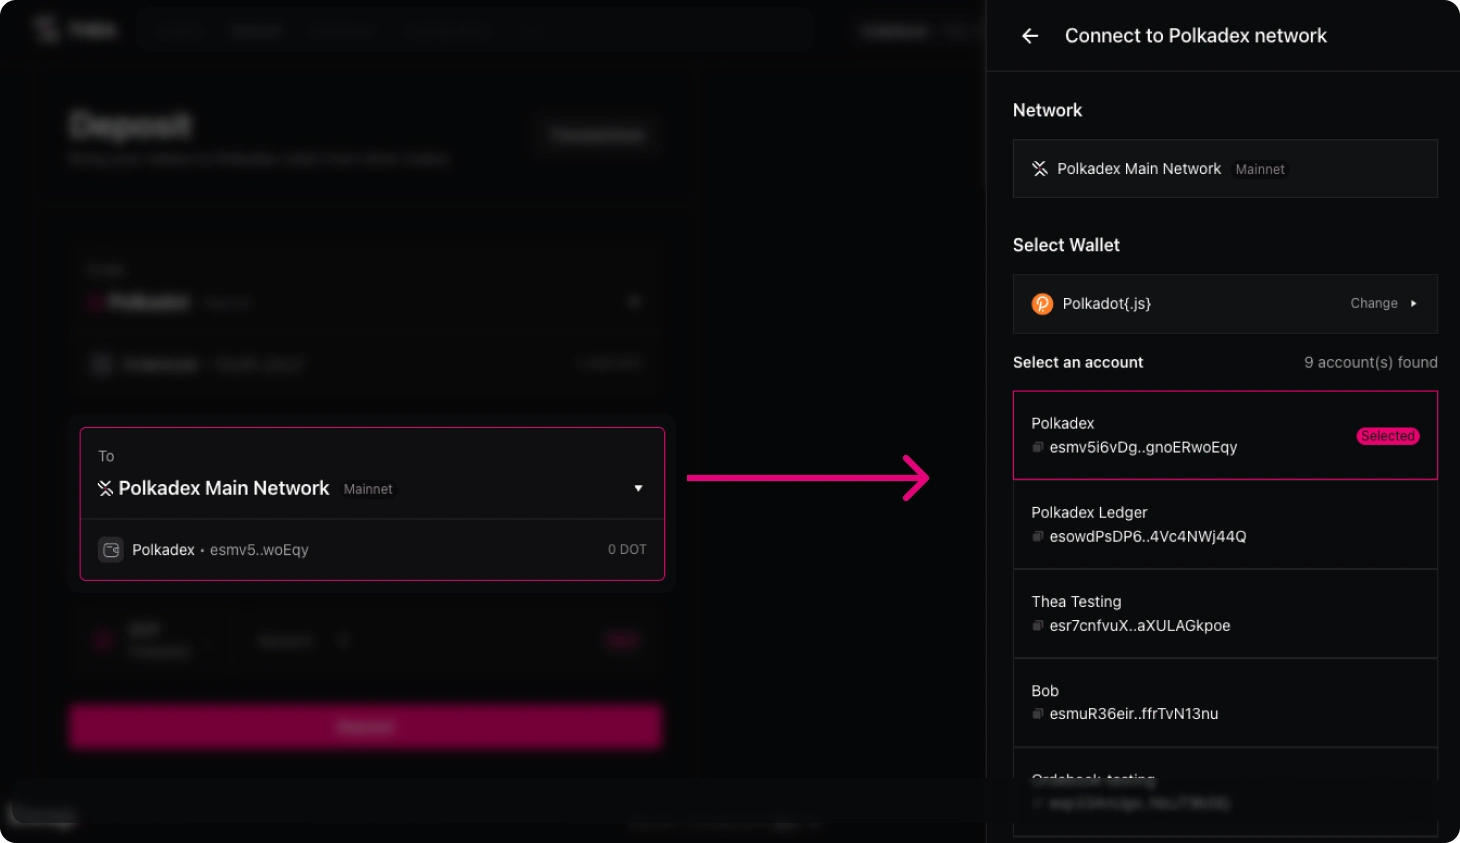
Select the wallet that contains a balance of the token you’d like to deposit to Polkadex Orderbook.
Click ‘To’ and select your Funding Account as the destination Polkadex account.
Select the asset (and amount) you want to transfer to the Polkadex network and click on the ‘Deposit’ button.
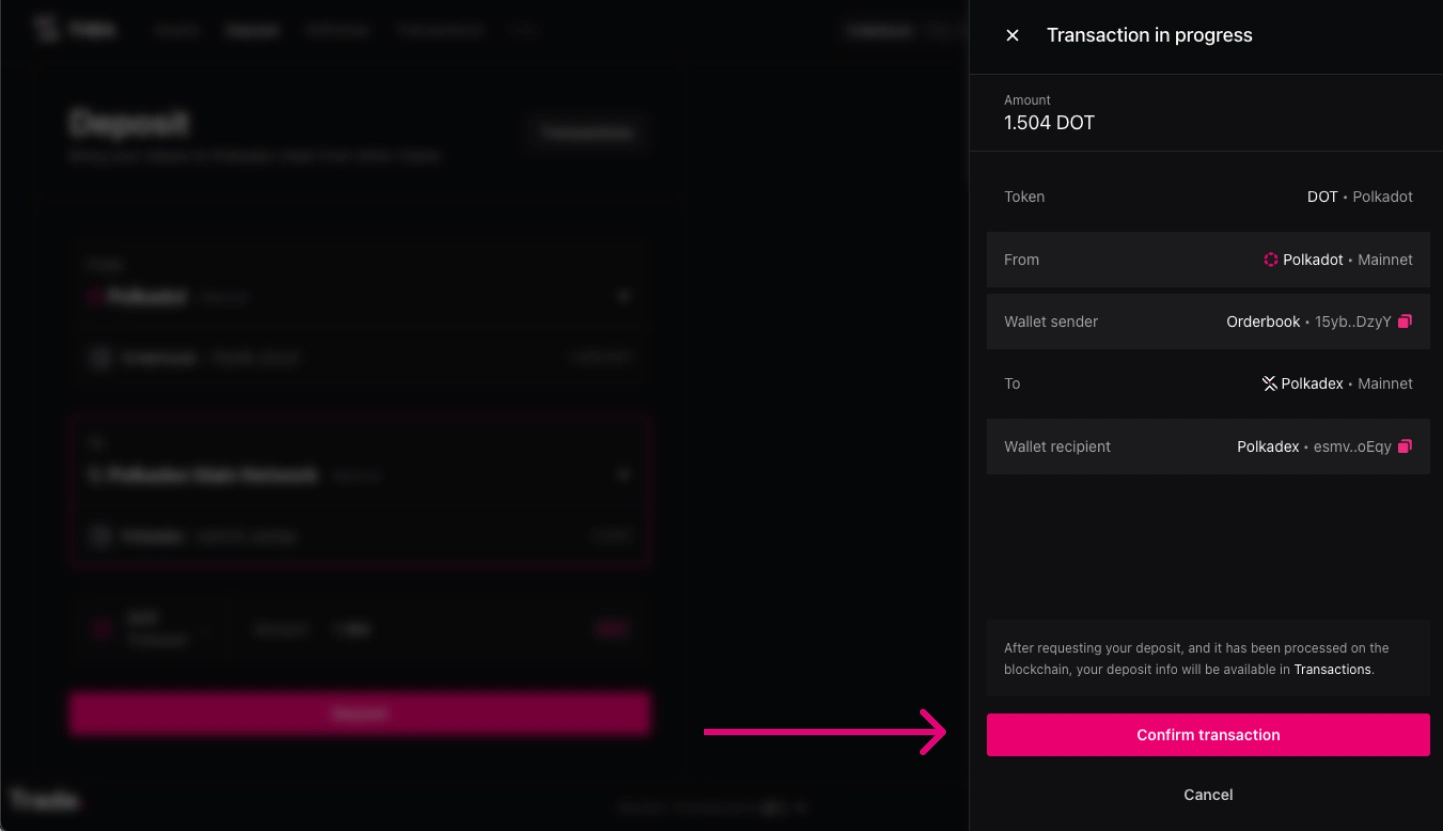
Confirm the details on the side window, click ‘Confirm Transaction’ and approve the transaction using your browser wallet to initiate your deposit between the network of origin and the Polkadex parachain.
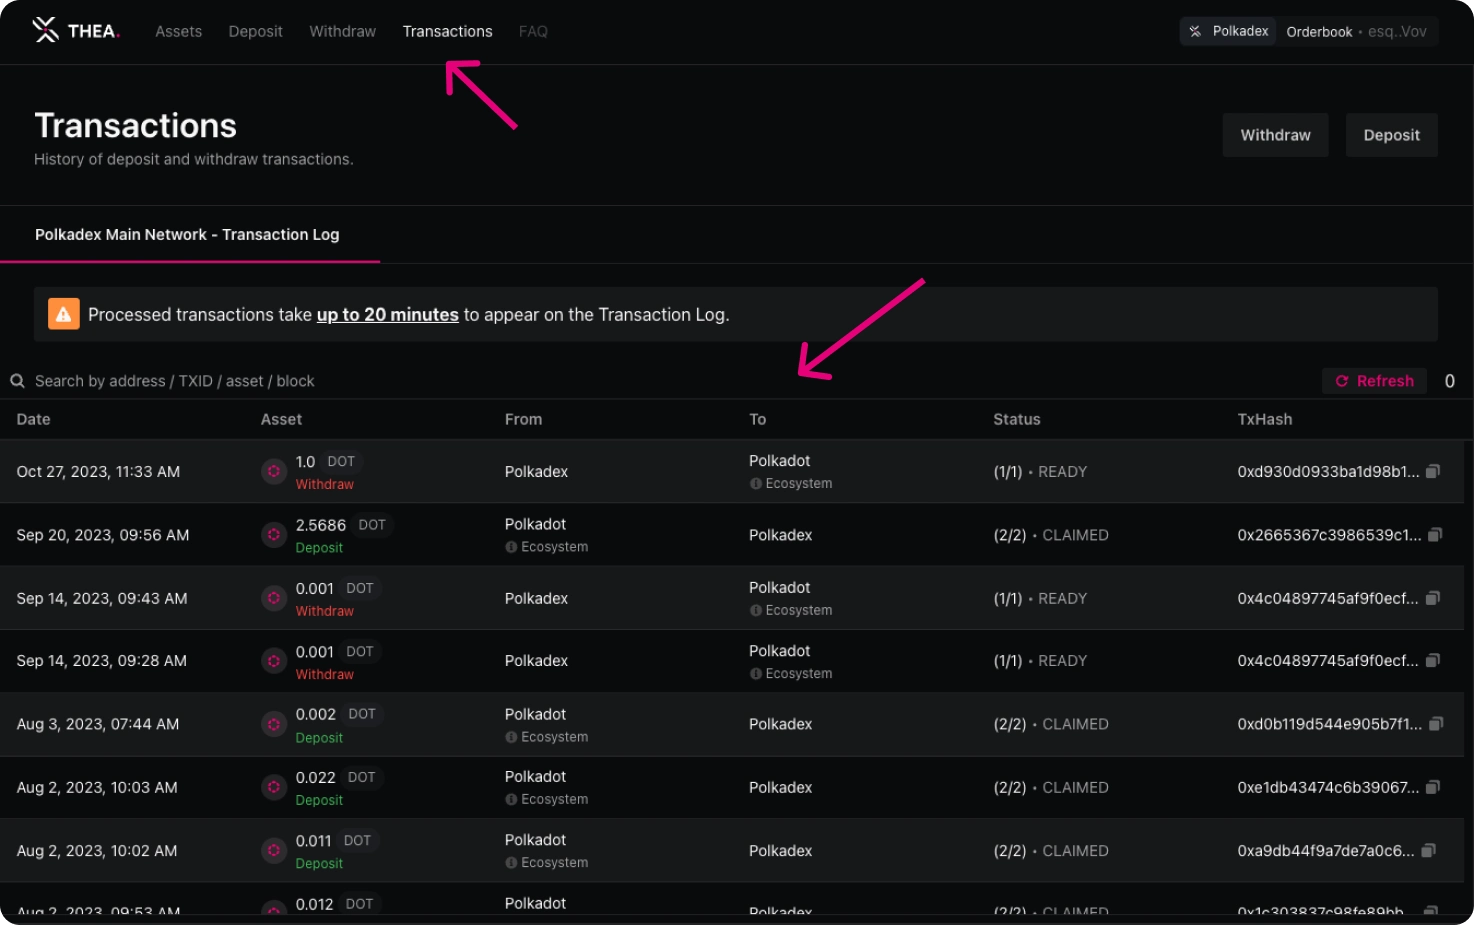
Once the transfer is approved on Polkadex Parachain (in about a minute), your deposit will appear as ‘(1/2 Approved)’ on the ‘Transactions’ page, as you still need to claim the deposit from the Polkadex parachain to complete the transfer to the Polkadex network. You may need to ‘Refresh’ the ‘Transaction Log’ to see it.
After your deposit is marked as ‘Approved’ in the Transaction Log, a ‘Claim Deposits’ button will appear on the top right corner of the Transaction Log. Click on ‘Claim Deposits’ to claim any of your unclaimed deposits from the Polkadex parachain to your Polkadex network account and complete the deposit process.
Navigate to the ‘Balances’ page on Polkadex Orderbook to see your deposit reflected in your Funding Account balance.
Finally, use the Orderbook transfer function in the ‘Balances’ page to transfer your newly added funds from your Funding Account to your Trading Account in order to trade.